Showing posts with label Flowers. Show all posts

Tuesday, April 18, 2017

DIY Hand-tied or Posy Yellow Roses Bridal Bouquet & Groom's Boutonniere

Lou and Ibo wedded for time and eternity - Congratulations!

Lou, our ward primary music directress was married for time and all eternity last April 2014.  As my way of congratulating her and the groom, I made her yellow roses bridal bouquet and John Ray's boutonnière.  

I love roses for one.  Lou's favorite color is yellow.  Thus their wedding motif color was yellow.  It is a happy color.  Very vibrant and alive.  Would you agree?

Mom bought the yellow roses at Dangwa from her "suki".  She bought 3 dozens.  She also bought 1 dozen of chrysanthemum mini green pompon flowers or hulagway in Filipino.

This kind of bridal bouquet actually costs expensive if ordered from a well-know florist.  I tell you it is not easy to cure roses.  But the feeling after is such an accomplishment.  

Here's how I made them:


STEPS:
To accentuate the yellow roses bouquet are the CHRYSANTHEMUM (or kermit) GREEN MINI BUTTON POMPON FLOWERS or HULAGWAY:

CURING them:
1.  Cut two inches bottom of 20 pcs green mini button poms (hulagway).  
2.  Soak the bottom into the cold Sprite(yep the soda Sprite). Keep it there overnight.


CURING the fresh yellow american roses:
1.  Cut the leaves and thorns using clipper and scissors.
2.  Cut the stem at the bottom.
3. Dip and soak rose in a clean vessel with cold Sprite overnight or at least 4 hours. This vessel was already washed with bleaching agent (zonrox) to make sure germs are dead.
4.  Rose petals will begin to tighten and freshen.

Making the hand-tied bouquet or posy:
1.  Using a rose/flower stand, form the roses into one bundle.
2.  Form the roses into a round shape.  Start 5 in the middle as the highest, 9 on the second level on a lower note, 12 on the third level on a lower note than the second, 9 on the 4th level lower than the third level. TIE altogether using a thicker wire or any lace to hold them into place.
3.  Cut the stem at the bottom (21/2 dozens); first with the same height.

Joining the accent into the rose:
1.  Place the chrysanthemums mini green pompons one after the other around the last level of the roses.
2.  Tie them around using a wire or ribbon.
3.  Make sure the level is lower than the roses.
4.  Tie the bouquet holder with lace.  Add accent like pearls if necessary.  Make sure the ribbon/lace covering is tight since this is where the bride holds it.
5.  Leave the latter bottom of the bouquet (2 inches) without the ribbon/lace.
6.  Have it stand in a tall glass or vase.
7. Using a clear glue or mighty bond, attach the silver Swarovski on the petals.
8.  Cut the end of the bouquet uniformly.


How to make the boutonnière:

1.  A single rose has been cured.
2.  Tie the 2 pcs chrysanthemum green mini pompons. One above the rose and the second a bit lower than the rose.
3.  Accentuate with the white silverish buds.
4.  Wrap the holder area with ribbon.
5.  Make sure the end was attached very well.


8 Supplies you must always have for this hobby or passion:
1. Flower clippers or scissors only intended for it
2. Clean large vases
3. Ribbons (double-edged or satin) & laces
4. Mighty bond 
5. Wires (covered and uncovered)
6. Accessories like pearls, swarovskis, others
7. glue gun and glue stick
8. used newspapers for the not-needed parts


NOTE:  Make sure your grip is tight.  DO NOT touch the petal nor the stem just below the flower.  It's very sensitive.

Taking off of the leaves and thorns

Tie them with a ribbon

Attach the green bud flowers by the second layer as accent

Using the mighty bond, attach the flat clear sequins


Wrapped the holder tight with ribbon as well as the strand of pearl

finished yellow bridal bouquet

Make the groom's boutonnière

final groom's boutonnière


wedding reception table

the happy Chesca at the temple while waiting for the couple to come out

Message me below if you have questions guys!  This is one of my hobbies I enjoy a lot!  What's yours?

EXPENSES
1. 3 dozen roses - P 360
2. 1 dozen hulagway - P80
3. Fare (back and forth)- 100
other items already available 
TOTAL :  P540.00


Monday, April 3, 2017

DIY Hand-tied or Posy Red Roses Bridal Bouquet & Bouttonierre

It was a rush bridal bouquet and groom's boutonnière because, they had to be wedded in the chapel on May 24th, 2014.  Mom rushed to Dangwa to buy fresh red roses.  It was our wedding gift for them.  It was also Manilyn's baptism.  So baptism and wedding sounded a lot like fun.  We know Dindo couldn't be happier.  

HOW TO PREPARE


STEPS:

To accentuate the red roses hand tied or posy bouquet.
1.  Cut 50 pcs green ribbons into 6 inches long each.
2.  Cut 50 pcs wire into 6 inches long.
3.  Fold the 6 inches long green ribbon into two using the wire thru the middle.
4.  Twist the wire in the middle to tighten and form the green into ribbon.
5.  Use glue gun for the strong hold of the end of the ribbon. 


CURING the fresh red roses:

1.  Cut the leaves and thorns using clipper and scissors.
2.  Cut the stem at the bottom.
3.  Dip and soak rose in a clean vessel with cold sprite overnight or at least 4 hours. This vessel was already washed with bleaching agent (zonrox) to make sure germs are dead.
4.  Rose petals will begin to tighten and freshen.

For the red roses:
1.  Using a rose/flower stand, form the roses into a bouquet.
2.  Form the roses into a round shape.  Start 3 in the middle as the highest, 6 on the second level on a lower note, 9 on the third level on a lower note than the second, 6 on the 4th level lower than the third level. TIE altogether using a thicker wire or any lace to hold them into place.
3.  Cut the stem at the bottom (2 dozens); first with the same height.

Joining the accent into the rose:
1.  Place the green ribbons one after the other around the last level of the roses.
2.  Tie them around using a wire or ribbon.
3.  Make sure the level is lower than the roses.
4.  Tie the bouquet holder with lace.  Add accent like pearls if necessary.  Make sure the ribbon/lace covering is tight since this is where the bride holds it.
5.  Leave the latter bottom of the bouquet (2 inches) without the ribbon/lace.
6.  Have it stand in a tall glass or vase.
7. Using a clear glue or mighty bond, attach the silver Swarovski on the petals.
8.  Cut the end of the bouquet uniformly.

NOTE:  Make sure your grip is tight.  DO NOT touch the petal nor the stem just below the flower.  It's very sensitive.

I assisted mom and finally we finished just in time.  Manilyn and Dindo were so happy.  Here's a proof of their happy wedding!

the beautiful bride, Manilyn and her bouquet we made for her

Congratulations Manilyn!  


Best Wishes for you guys!
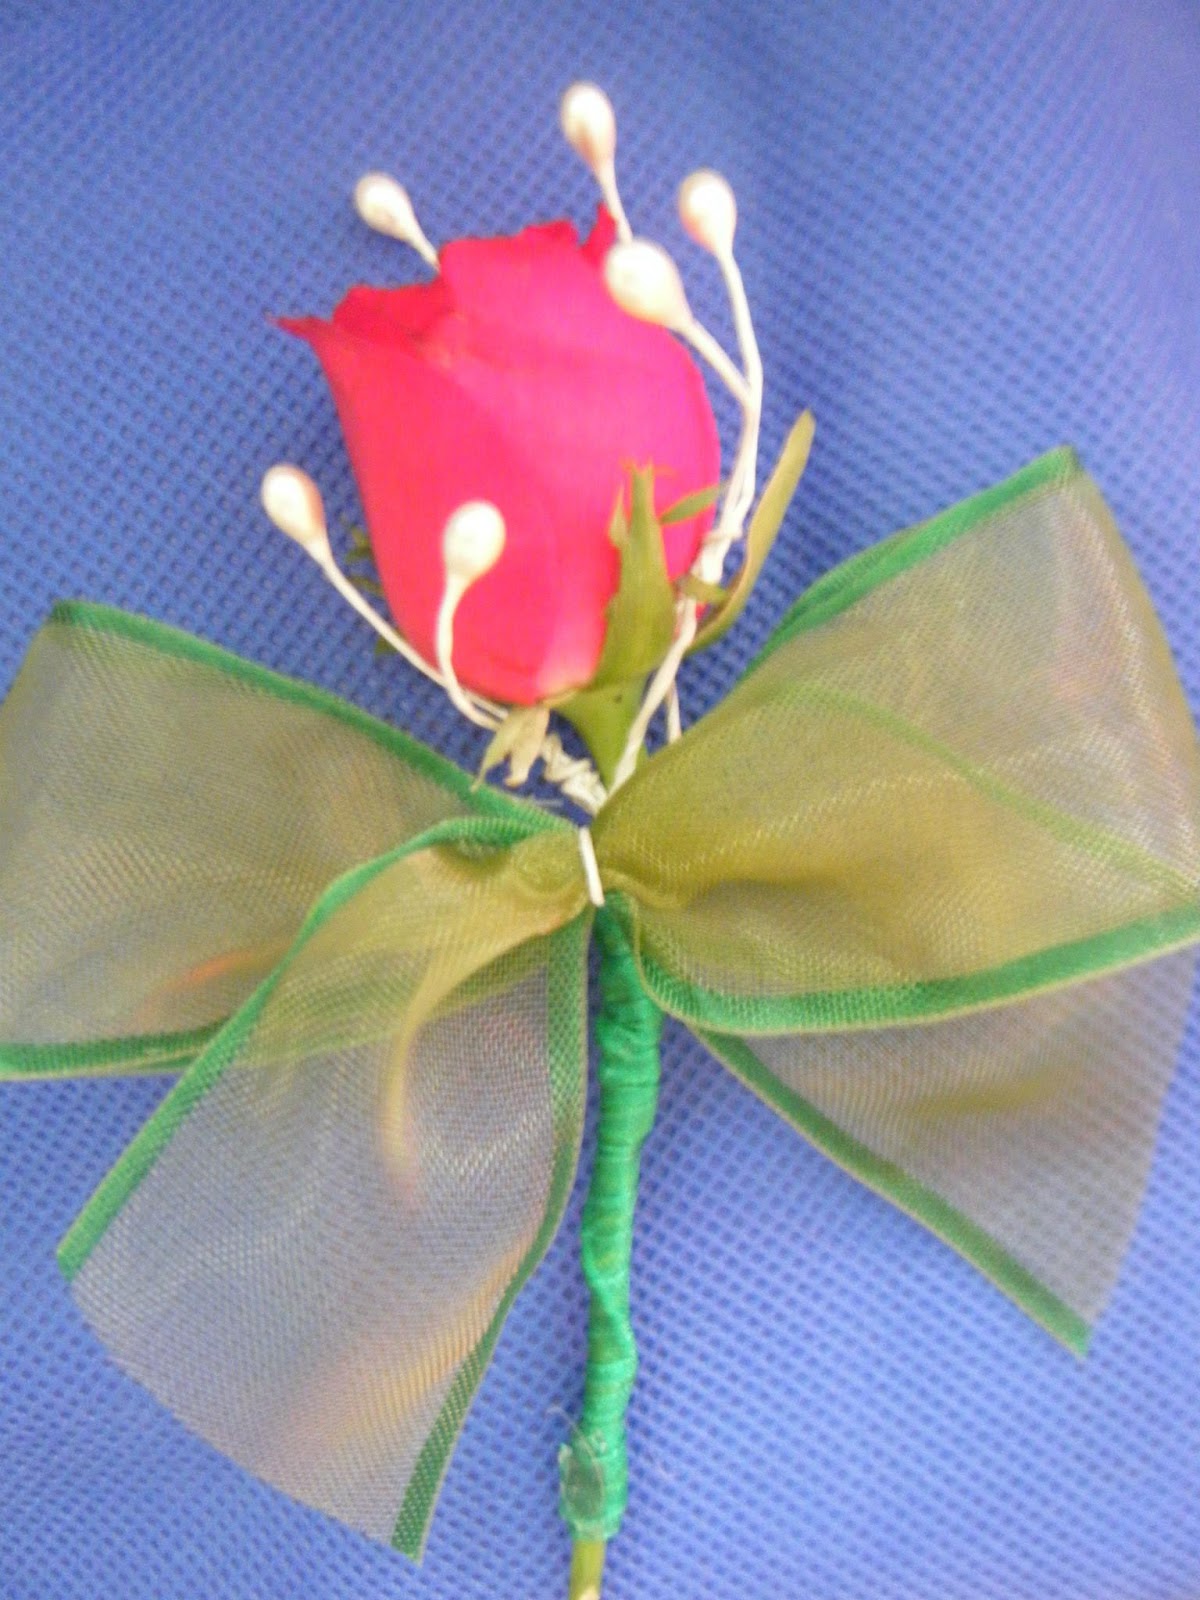
How to make Dindo's boutonnière:

1.  A single rose has been cured.
2.  Tie the green ribbon just below the rose.
3.  Accentuate with the white silverish buds.
4.  Wrap the holder area with ribbon.
5.  Make sure the end was attached very well.

Dindo's boutonniere - single red rose
BUDGET

1.  Fare (back and forth)  =  P  30
2.  2 dozens of red roses  =  P250
3.  Green ribbon              = from previous project
4.  Wire                           = from previous project
5.  Sprite for curing        =      50
6.  Swarovski's                = from previous project
7.  mighty bond               =     50
8.  ribbon for wrap          = from previous project
9.  Accent silver bud       = from previous project

TOTAL                           =  P 380.00


HOW TO GO TO DANGWA

Fast Facts:
Nearest Train Station:  LRT2-Tayuman
Bus Route:  Dangwa Tranco Bus Termnial (Bound for Banaue, Bulacan, Nueva Ecija, Nueva Vizcaya, and Kalinga, among others)
Jeepney Routes:  Taft-Dapitan UST; Taft-Blumentritt Dimasalang; Divisoria-Blumentritt Dimasalang
Nearby Places:  Dangwa Bus Terminal, Farinas Transit Bus Terminal, SM San Lazaro, University of Sto. Tomas (UST)

Commuting Routes:
From Caloocan:
1.  Along Quirino Highway (Novaliches-Ipo Road), ride an FX/jeep to Blumentrii, and get off at Dapitan.
2.  Ride a jeep to Quiapo, and get off at A.H. Lacson (Gov. Forbes).  Dangwa is just after  UST/A.H. Lacson (Gov. Forbes).

From Las Pinas/Muntinlupa:
Route 1:  Bus-MRT-FX/Jeep-Jeep
1. Ride a bus to Lawtan via NLEX and get off at EDSA corner Taft Avenue.
2. Take the MRT to Quezon Avene station
3. Walk to Quezon Avenue.
4. Cross Quezon Avenue.
5. Along Quezon Avenue, ride an FX/jeep to Quiapo, and get off at Quiapo.
6. At Quiapo, ride a jeep to Dapitan-UST or Blumentritt-Dimasalang, and get off at Dangwa.  Dangwa is just after UST/A.H. Lacson (Gov. Forbes).

Route 2:
1. Ride a bus to Lawton and get off anywhere along Taft Avenue.
2. From Taft, take the jeep to Dapitan-UST or Blumentritt-Dimasalang, and get off at Dangwa. Dangwa is just after UST/A.H. Lacson (Gov. Forbes)

From Makati:
Route 1:  MRT-FX/Jeep-Jeep
1. Take the MRT to Quezon Avenue Station.
2. Walk to Quezon Avenue.
3. Cross Quezon Avenue.
4. Along Quezon Avenue, ride an FX/jeep to Quiapo, and get off at Quiapo.
5. At Quiapo, ride a jeep to Dapitan-UST or Blumentritt-Dimasalang, and get off at Dangwa. Dangwa is just after UST/A.H. Lacson (Gov. Forbes)

Check out :  www.ph-commute.com/2008/02/how-to-commute-to-dangwa-manila.html

Which is Better: PAID or FREE Cosplay Event?

What is Cosplay? Cosplay. a portmanteau of "costume play" is an activity and performance art in which participants called cosplaye...